SHANE STEINKAMP'S BACKPACKING BASE CAMP
HENNESSY HAMMOCK - SNAKESKINS
Snakeskins are a pair of Silnylon tubes, slightly longer than half the longest dimension of the rain fly, parallel with the ridge cord, and wider at one end than the other. Snakeskins, when deployed, meet and slightly overlap in the middle of the hammock and turn the hammock and rain fly into a long "snake" with the suspension ropes coming out of either end. Installation takes just a few minutes, and is accomplished by removing the webbing tree huggers and threading the Snakeskins onto each suspension rope, one on each side, then reinstalling the tree huggers. The widest end of the Snakeskins is threaded on first, and they bunch up nicely next to the ridge cord knot.
At first blush, I was very excited about the Snakeskins. When I first heard about them, my imagination ran wild as I considered what a wonderful idea they are. After setting up and taking down hammocks of all kinds and having to fold and roll them just so while keeping the cords from getting tangled, I have often wished for an easier way. The Snakeskins were a real forehead-slapper for me and I was anxious to try them. In actual practice, however, they were not easy to use, being rather tight and requiring a lot of fussing to finally stuff every bit of the hammock and rain fly into the Snakeskins' overly tight tubes.
After putting Tom and Ann Hennessy though a lot of trouble, and having them send me two replacement sets of Snakeskins, I found out that I wasn't using them right. If you know how, it's easy - their use just isn't intuitive. You'd think that all you have to do is grab an end and slide it over the hammock. In reality, it's almost that easy - but it helps to know a few tricks. This page is designed to explain those 'tricks', and as a public apology to Tom and Ann for putting them through so much trouble...
They are rather ingenious, and make things like tangled cords a thing
of the past. You no longer have to try to fold or roll the hammock
bed and rain fly in order to stuff it into the stuff sack. This is
especially appreciated in wet and/or windy conditions. With the
Snakeskins you really don't need a stuff sack at all. Once encased
in the Snakeskins, the Hennessy Hammock coils (snake-like) easily in the
bottom of your pack. Using a frame pack, you can wrap it around and
around the pack bag where the pack bag meets the frame, and tie it off,
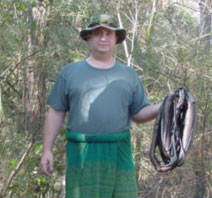
saving space inside your pack. 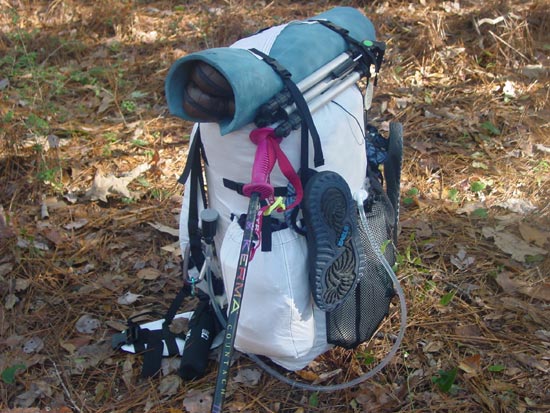 I
like to roll my Hennessy up in my sit pad and strap it to the top of my pack
(The KISKIL Mithril). You can see the Snakeskin tubes showing on the side
in this photo. The largest benefit to using the
Snakeskins is in bad weather. When setting up, you don't have to
hassle with trying to keep everything dry or keep the rain fly from
blowing away. When taking the hammock down after a rain, you no
longer have to worry about packing a wet rain fly since the entire rain
fly is encased in a water proof tube.
I
like to roll my Hennessy up in my sit pad and strap it to the top of my pack
(The KISKIL Mithril). You can see the Snakeskin tubes showing on the side
in this photo. The largest benefit to using the
Snakeskins is in bad weather. When setting up, you don't have to
hassle with trying to keep everything dry or keep the rain fly from
blowing away. When taking the hammock down after a rain, you no
longer have to worry about packing a wet rain fly since the entire rain
fly is encased in a water proof tube.
An important side benefit of the Snakeskins is not even mentioned in the instructions or on the Hennessy website. One of the banes of hammock use is heavy rain because the suspension ropes become saturated and water wicks along the ropes and wets the hammock bed. The common solution is to tie cotton or other absorbent strings to the suspension ropes near their attachment to the hammock bed. The strings wick water away from the rope and it drips to the ground instead of wetting the hammock bed. With the Snakeskins, the drip strings are no longer necessary. Once the hammock is deployed and the rain fly properly tensioned, simply slide the suspension knot (distal) end of the Snakeskins up to the tie-off knot and the hammock bed (proximal) end of the Snakeskins down the suspension rope to cover the first few inches (few centimeters) of the corner of the rain fly. Protecting the suspension ropes with the Snakeskins keeps them dry. While the knot could still become wet and capillary action could carry the water along the suspension rope and to the hammock bed, I never experience this with the Snakeskins deployed to protect the suspension ropes in the manner described. It would be nice if the Snakeskins would flare at the distal end for just a few (6 or 8) inches (15 or 20 centimeters) and functionally cover the knot as well, but this isn't actually necessary.
Now that I've told you all about why you should use them, now for the how...
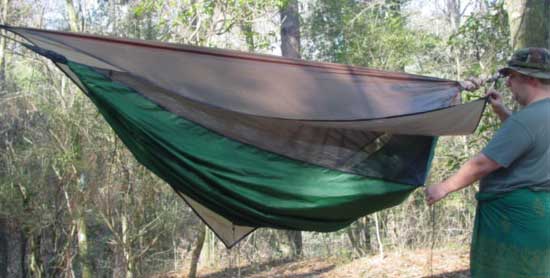
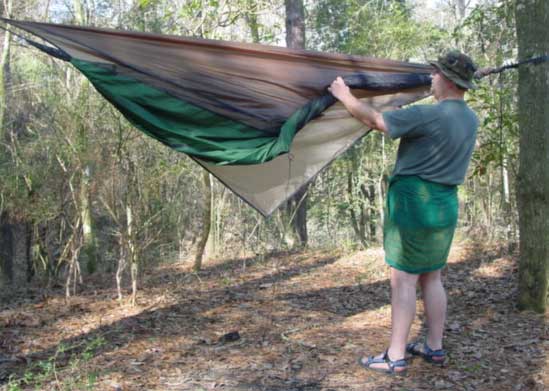
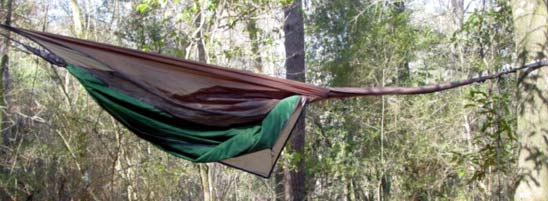
I start from the head end of the hammock. Disconnect the tie-outs, and separate the fly from the hammock bed. Start with each side of the tarp on the correct side of the hammock bed.
Gather the hammock bed tie-out and fold it into the hammock bed. Gather the rain fly tie-out and fold it into the fly. Keeping the tie-out cords separate keeps them from tangling.
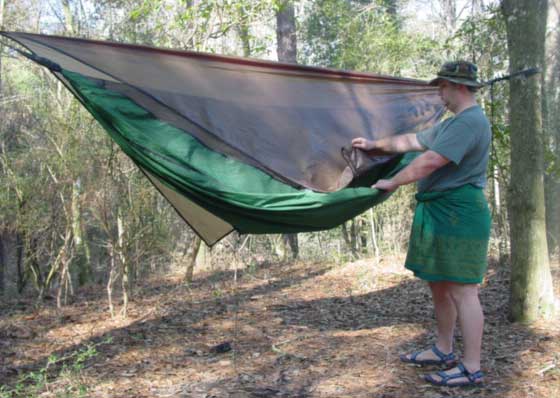
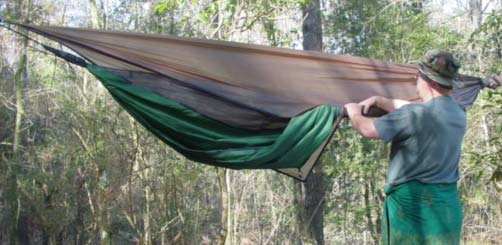
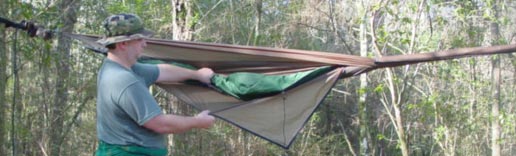
Now roll the rain fly up in the hammock bed like this, remembering to pull away from the center in order to bias the roll away from the center. You want to bias the rolling material so that you don't end up with a lump in the center. You will wind up with a lump at the end, but that's OK as long as you don't have a lump in the middle.
Once you've rolled the fly up a little more than half way, pull the other side of the rain fly out.
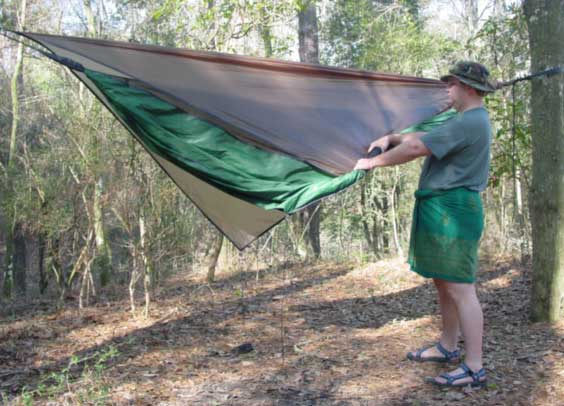
Remember to maintain the bias of the roll away from the center, and start rolling the opposite side of the fly along with the material you have already gathered.
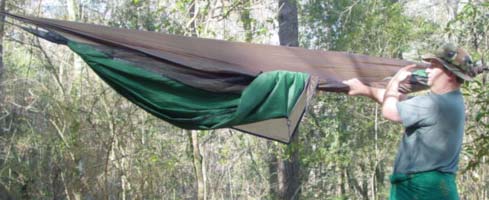
Keep rolling it tightly, with the bias away from the center, as I am indicating here. This is VERY important.
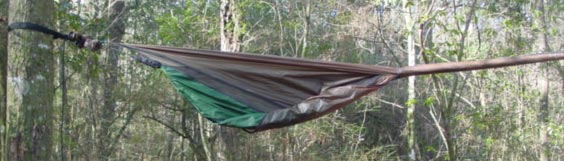
Roll it tightly all the way up to the ridge cord. The hammock bed will not be exposed. Only the rain fly will be visible.
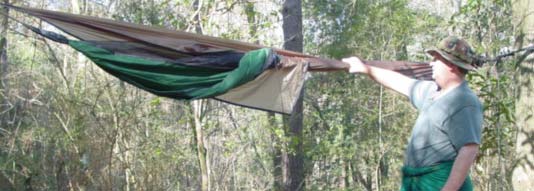
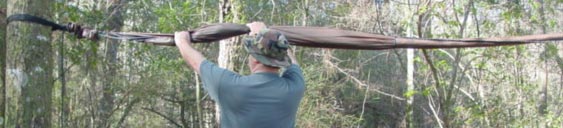
Slide the Snakeskin out by grasping it behind the collar and pulling it out over the material you have tightly rolled.
Now address the other side. Pull the opposite side of the tarp under the hammock bed.
Gather and tuck the tie-outs, and tuck the opposite side of the fly into the roll of the hammock bed.
Now roll it up to the ridge cord, remembering to bias the roll away from the center. (Are you getting the idea yet that you should bias the roll away from the center? Good.) Once rolled, it will look like the above photo. A nice, tight roll near the center, with a chaotic gathering of material (a lump) nearer to the suspension point (distal end). The other side should have looked like this too if you properly biased the roll away from the center.
Gather and roll the rest of the material tightly. You will still have that bulge.
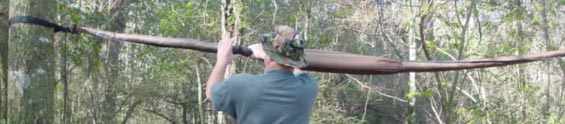
Now pull out the other side of the Snakeskins over the lump and as far as you can to the center.
When you do this, the Silnylon of the rain fly will form a balloon filled with air.
Simply work your fingers into this 'balloon' and squeeze the air out. It will deflate quickly.
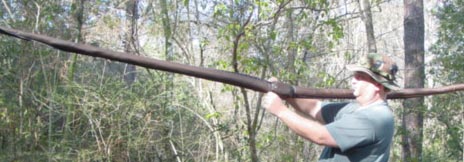
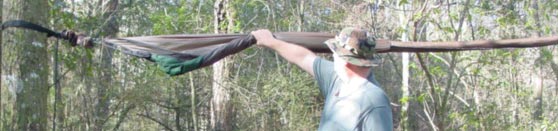
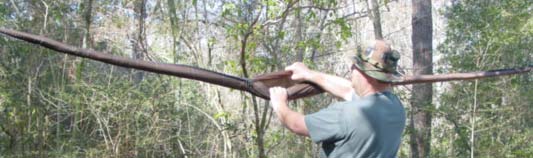
Once the balloon is gone, stick your thumbs into either side of the Snakeskins' mouth and pull. Repeat with the other side, and overlap the Snakeskins by a few inches.
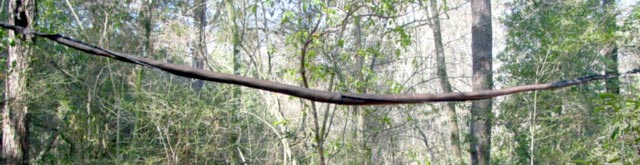
Presto! All done. Time trials proved that I could do it in ten seconds, just like the instructions said. I preferred to take a little more time and make it very neat. When untying the hammock from the supports (trees, etc.), I like to tie a simple knot in the foot end rope so that I know which end is which next time I set it up. You could also mark the Snakeskin with something to let you know which end is which.
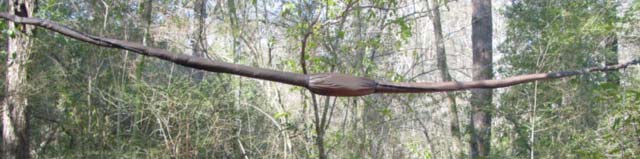
 Here is the
hammock, rolled up and ready to be stuffed into a pack. Some
people wind the suspension ropes around the main bundle and create a very
compact package that stuffs easily just about anywhere.
Here is the
hammock, rolled up and ready to be stuffed into a pack. Some
people wind the suspension ropes around the main bundle and create a very
compact package that stuffs easily just about anywhere.
HOW TO HH
HOW TO HH HOME
OVERVIEW
VIDEO OVERVIEW 1
VIDEO OVERVIEW 2
THE KNOT
SNAKESKINS